VQ Conference Manager – MetroTM, also referred to here as ‘Metro’, is an end-user-focused client for use in VQCM/CMS environments. It has been designed for managing Spaces, booking meetings and joining calls with a high-quality, intuitive video client.
Using Metro, service owners and administrators can provide desktop or mobile access to basic features required by their end users, allowing them to book and manage Spaces and join calls when unable to access collaboration rooms and devices.
The ‘low/no touch’ nature of the Metro application enables its deployment quickly and seamlessly without additional infrastructure or often complex application ‘packaging’.
Note: VQ intends for this first release of Metro to be for testing and evaluation purposes. We do not recommend deploying the client or browser URL to production users.
VQ Conference Manager Metro Overview
Page features and layout
Metro is a ‘web app’, meaning it is delivered using technologies that are fully compatible with modern browsers. At the same time, it can be packaged and delivered as installable applications on common platforms such as Windows, MacOS and iOS.
Let’s look at Metro in more detail.
Bottom Bar – Main Menu
Metro functionality is grouped into three categories – Spaces, Meetings and Settings – and accessed via the bottom bar.
Spaces
The Spaces area of Metro is where users will find a list of all Spaces they have permission to manage, book or join. If you are assigned a ‘Role’ in a Space, it will appear in your list.
Meetings
Meetings in Metro are bookings made against a Space through VQ Conference Manager.
This calendar is not connected to Outlook or Exchange at this stage; you will only see bookings made against Spaces visible to you in Metro. This will include temporary Spaces created from the Metro application.
Settings
End-user preference and local device settings can be accessed and managed here. This includes default devices or applications for calls and accessibility preferences, such as language and dark mode.
Metro components and application architecture
Metro is delivered as a new user interface (UI) of Conference Manager 3.12 utilising the CMS’ ‘Web Bridge’ feature. As such, it introduces no new components to the customer environment and runs within the existing virtual servers hosting VQCM and CMS.
If your environment does not currently have CMS Web Bridge/WebApp running, then it will need to be configured to run on the CMS before attempting to load and run Metro.
Setting up Metro
Load the Playbook
Metro is deployable using an Ansible Playbook that can be downloaded by customers licensed for the VQCM Applications Pack on request from support@vqcomms.com
To load the Playbook, please follow the instructions provided with it. Metro can then be as a Windows or MacOS client or in a browser using the https://FQDN/metro URL.
Using Metro
Logging in
When logging in to the Metro application for the first time on Windows or MacOS, it will present you with the login page.
You should insert VQ Conference Manager’s URL into the ‘URL’ field. Users can obtain this from a browser logged in to Conference Manager or distributed via email.
Metro will then request the user to log in. Enter your Conference Manager login name and password and click Sign In.
Once logged in, Metro will display the start view.
Spaces
Start-up view
The Spaces you can access and use in Metro are in the left-hand side panel.
Metro Modules are at the bottom of the page in the menu bar; a click on these will switch to the main view of that module.
Details of the Space and options for managing, scheduling (meetings), or joining the Space are shown in the main panel.
The options and information provided in this panel have been cut down considerably from the ‘advanced’ views available in the Conference Manager browser interface. This is intended to only provide the end user with key information they might use while using Metro.
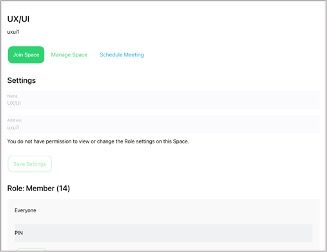
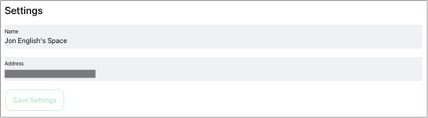
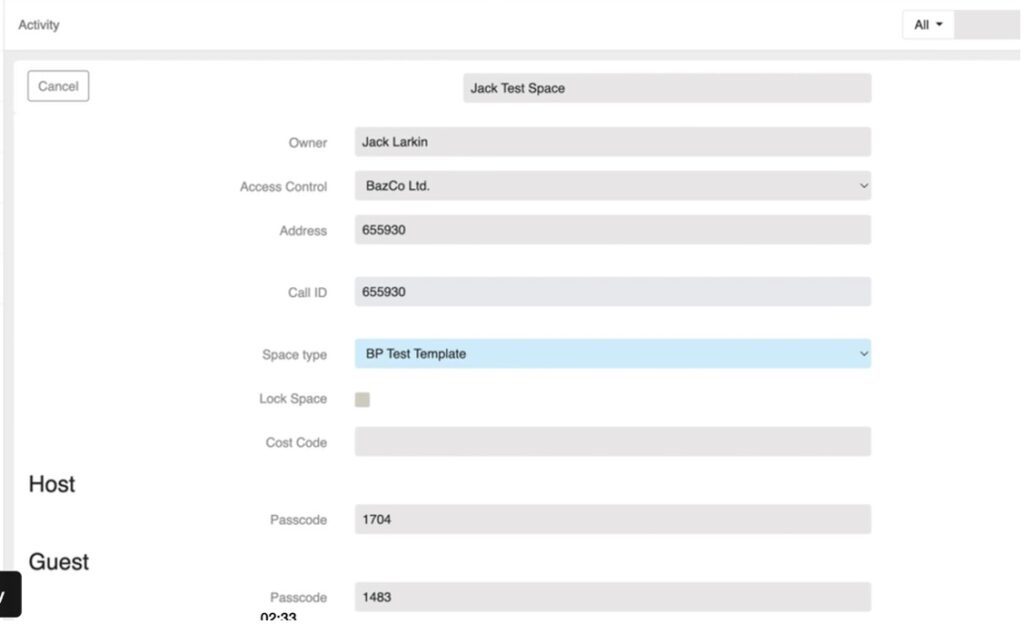
Viewing/Editing Space details
The user can edit the basic settings of the Space, its name and SIP address.
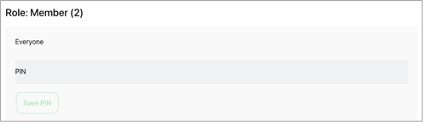
They can edit the PINs required for the roles defined in the Space on entry to meetings. This might be useful for users wanting to set the PIN for a specific meeting running in a Space, or to change it if the use of the Space changes.
Join links and Join text are available for copy/paste into invitations being sent out via other systems such as Email or Instant Messaging.
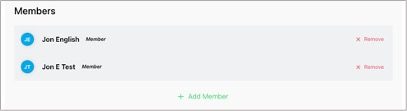
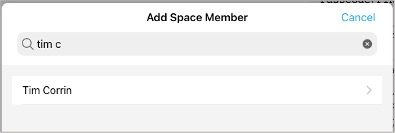
Membership of the Space can be managed by adding or removing users from the Conference Manager database.
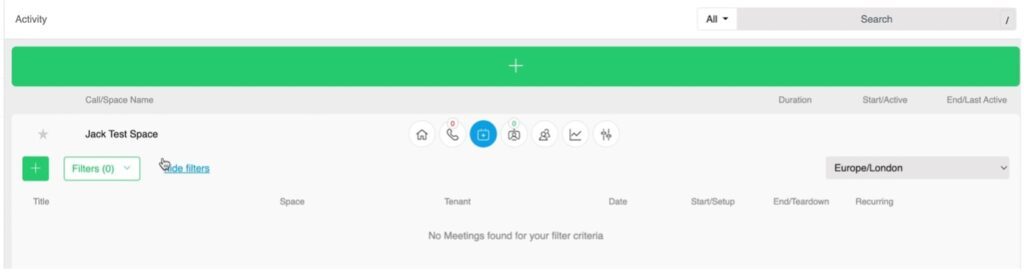
You can access every Space in the sidebar in the same way, simply by clicking on that Space.
The Space being viewed is highlighted in blue.
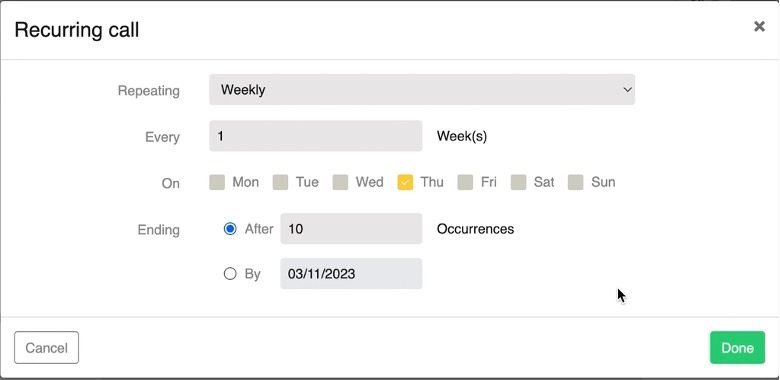
Scheduling a meeting in a Space
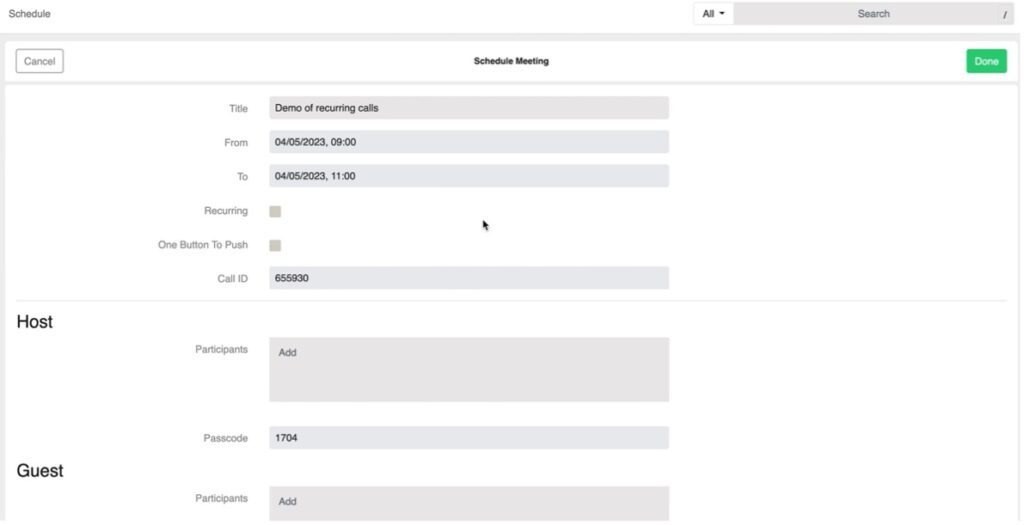
To schedule a meeting in a Space, click on ‘Schedule Meeting’ in the main panel.
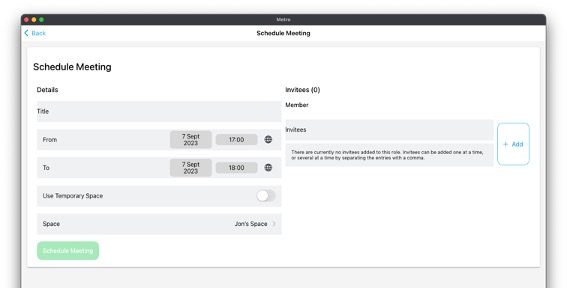
The Metro Schedule Meeting page will be displayed.
Note: This page is identical to what a user will see if clicking the Meetings button on the main bar.
On this page, the user should provide a meeting title, start/finish date & time (and time zone if required) and type or copy/paste the email addresses of the meeting attendees.
Click Schedule Meeting to save the meeting in Conference Manager and email the attendees. Email addresses must be comma-separated for Metro to accept them as valid.
Note: In a future release of Metro, we will support adding Conference Manager registered people and devices (for OBTP) from the Conference Manager ‘endpoints’ database.
Metro will then take you to the Meetings page where you will see the meeting shown in the calendar view. You can make any subsequent changes from this page.
Join a Space
In the main panel of the Spaces page you can join a meeting in a space using the WebRTC video client built into Metro.
Select the Space you want to join and then click the ‘Join Space’ button in the main panel.
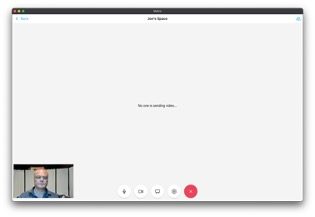
Metro will launch a new window to join the Space.
When other participants join, Metro will display them in the main video pane of the client.
The video window will display controls for muting or unmuting audio, enabling or disabling a camera, settings and ending the call.
There is a sidebar which provides access to basic meeting controls by clicking the button in the top right corner of the page.
On this sidebar you can see those participants in the call, who is speaking and change settings of the call – such as the layout. For more meeting controls, you can use the Manage Space page.
It is also possible to drop from the call and go back to the Space window using the Back in the top left of the window.
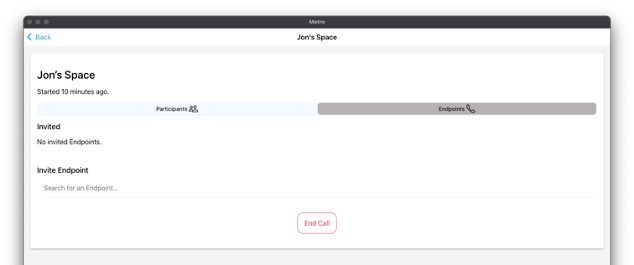
Manage Space
When the Space is active (i.e., there are participants called into it), the owner of the Space can ‘manage’ the call through a simple interface designed for an end user.
On this page you can manage participant settings: audio mute/unmute, video on/off, disconnect a participant, or end the call for everyone.
In the Endpoints view, you can invite Conference Manager registered users and devices from the Endpoints database.
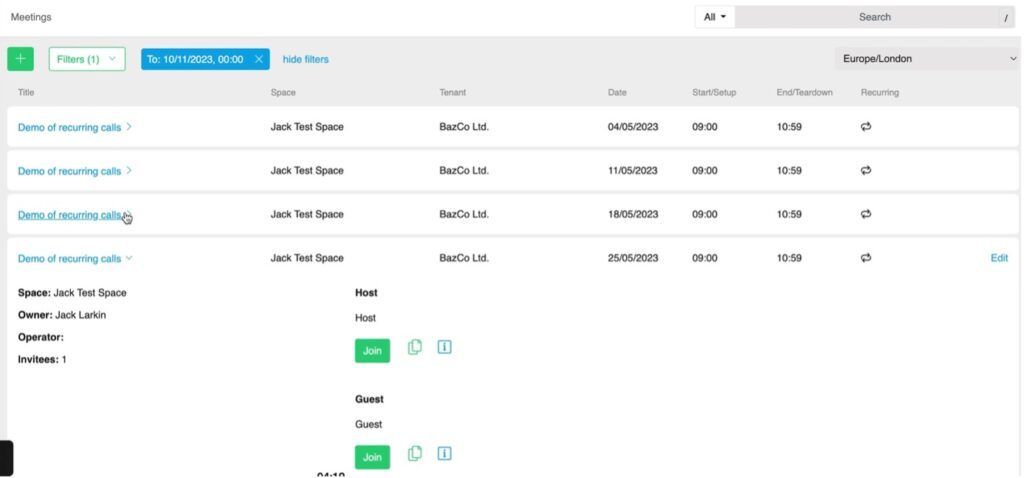
Meetings
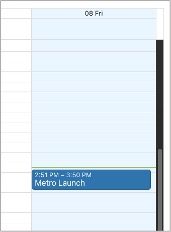
Calendar
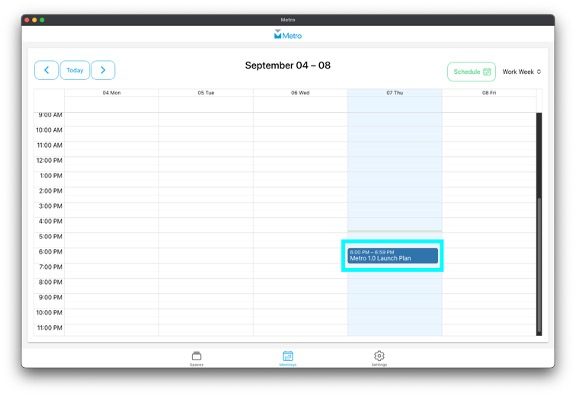
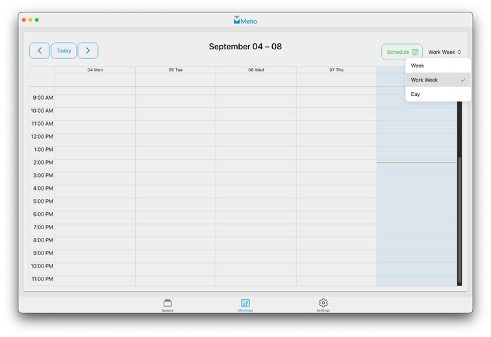
The default view of the Meetings module in Metro is the Calendar page. This page can display ‘week’, ‘work week’ (5 days) and ‘Day’ views of the Conference Manager bookings on Spaces assigned to a user.
From the calendar you can go directly to the Schedule page to make a booking.
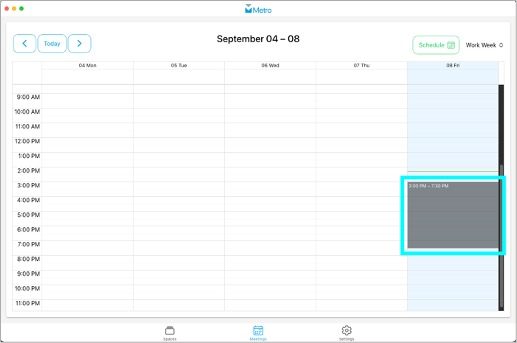
Alternatively, you can ‘drag and create’ a meeting on the calendar using your mouse.
Once you have marked the required time/date on the calendar, Metro will take you to the Schedule page to complete the booking.
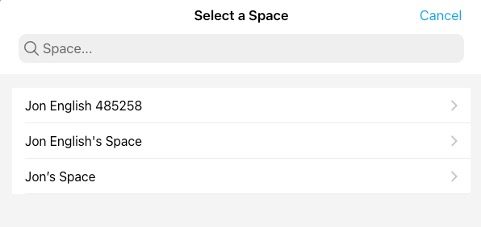
You will notice that unlike the page presented when making a booking from within a Space, the Space field will be prompting you to ‘Select a Space’.
Click in the field and it will prompt you to type search text. It will display Spaces that match the search. Click on your required Space and the client will return to the schedule page to complete your booking entry.
If you want to use a Temporary Space for the meeting – a Space that only exists for the duration of the meeting – move the ‘Use Temporary Space’ slider to ‘On’.
Metro will create a temporary Space just before a meeting starts based on your Conference Manager’s ‘set up time’ setting.
The Conference Manager calendar will then display the meeting.
When a Space is created, it will also appear in the sidebar. You can join the meeting by clicking the Join Space button in the Space view.
Settings
Main page
The main page of the Settings module in Metro is in three sections: User, Behaviour and Display.
You can force a logout from Metro in the User section.
It is unnecessary to logout each time you want to close Metro, though it is useful if you need to switch users or VQ has advised you to do so while troubleshooting.
In Behavior you can select your default Space which will be displayed at the top of your sidebar list. Note: Space with active calls in progress will show above the default Space.
You can also select the default client that Metro will launch when joining calls. The default is the Metro WebRTC client, but this can also be the CMS WebApp in a browser, Webex or a SIP client.
You can also change the settings for your preferred camera, microphone, and speaker (if supported by your browser) here.
Finally, in Display, you can select your preferred language, time zone and color theme (Light or Dark).
The currently supported languages are English (US), English (UK), German, French and Arabic.
Interested in finding out more?
Looking for more technical information on Metro? There is an on-demand webinar waiting for you.
For any enquiries, please contact us.